使用 GitHub Actions 自动部署 Hexo 博客

使用 GitHub Actions 自动部署 Hexo 博客
Yuban前言
Hexo 是一个快速、简洁且高效的静态博客框架,适合技术类博客搭建。通过 GitHub Actions,我们可以实现代码提交后自动构建并部署博客,彻底告别手动部署,提升效率。
一、创建 GitHub 仓库
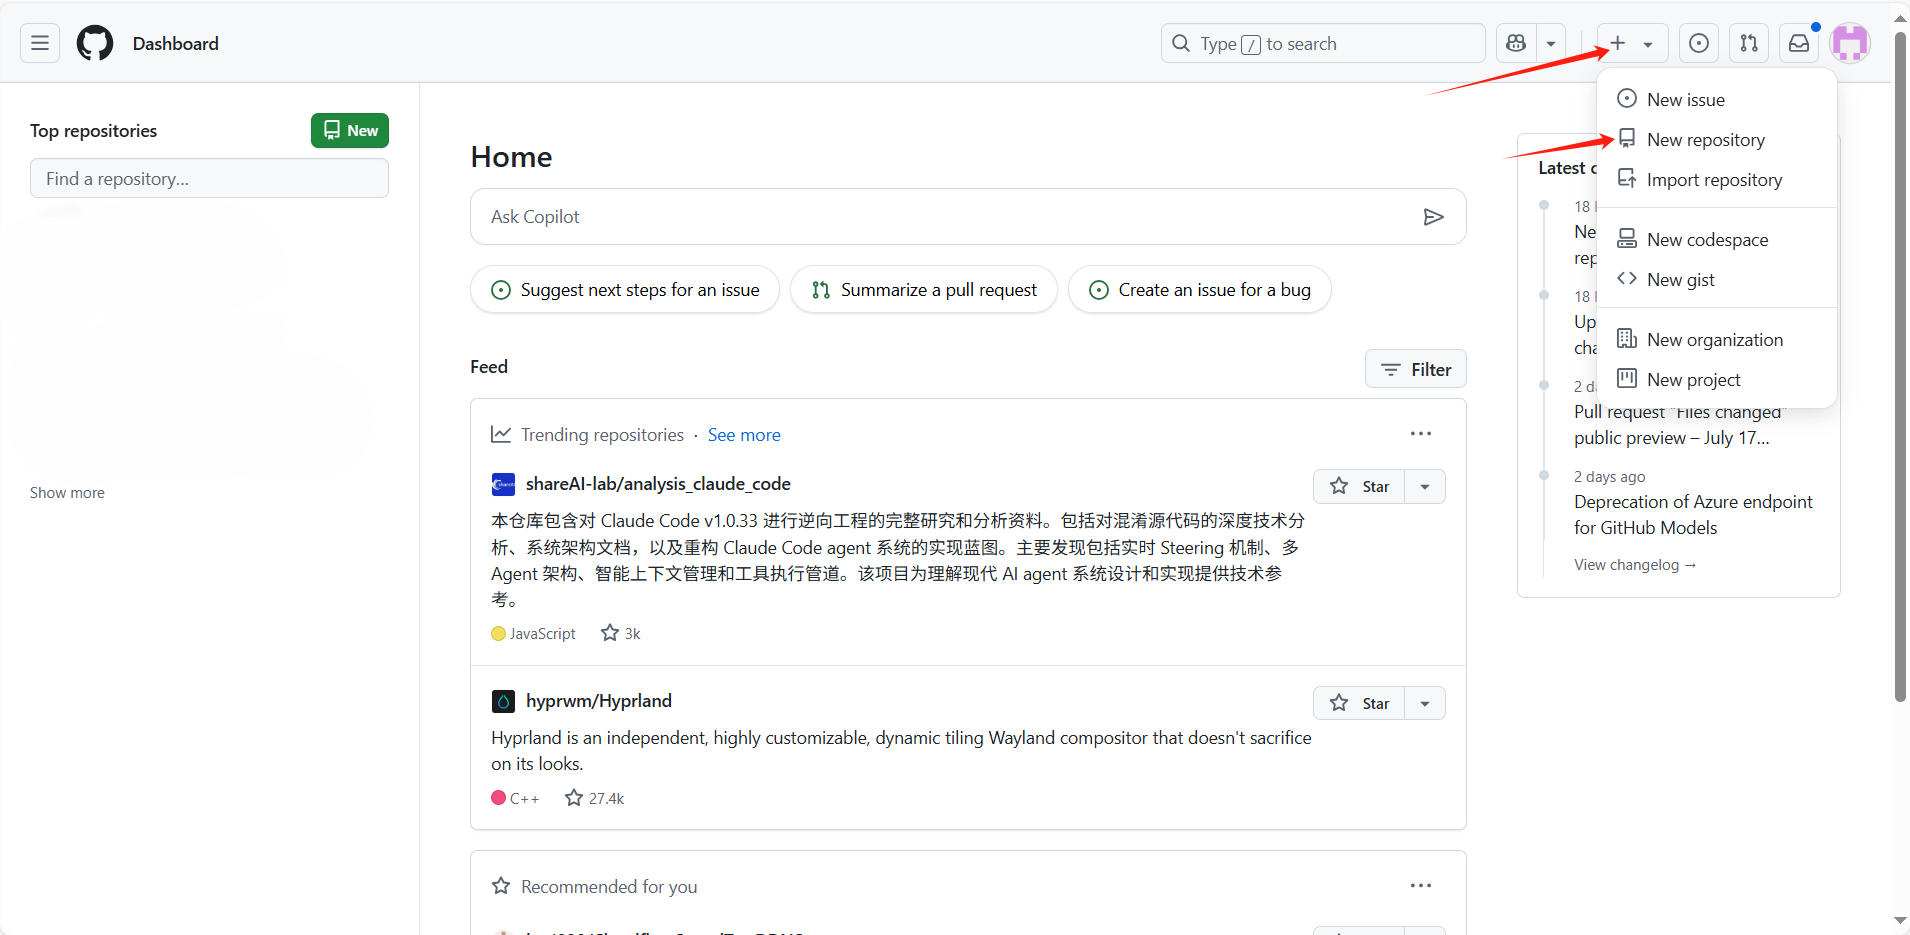
登录 GitHub,点击右上角的 +,选择 New repository。
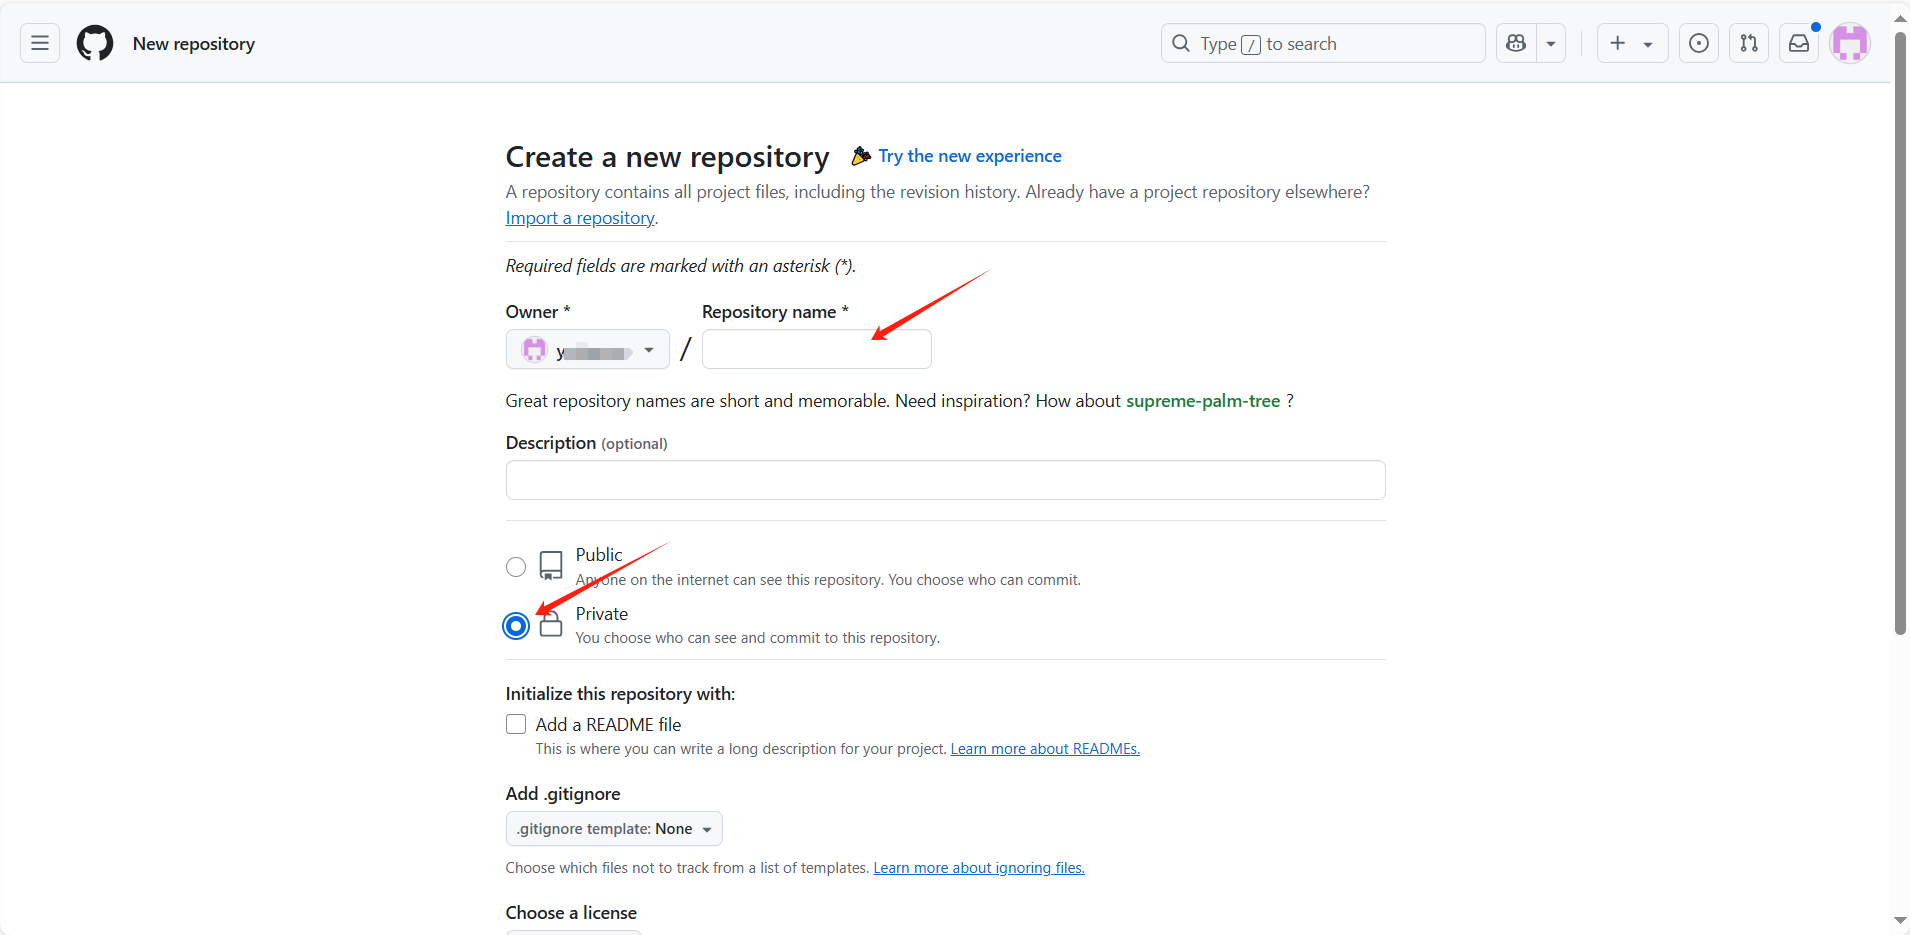
填写内容如下:
- Repository name:自定义你的仓库名,例如
hexo - Visibility:选择
Private(私有) - 其他选项保持默认,点击 Create repository
二、初始化 Hexo 项目
打开命令行工具(CMD、终端或 PowerShell),执行以下命令:
1 | # 全局安装 Hexo CLI 工具 |
💡 如果你是 macOS 用户,也可以使用 Homebrew 安装 Hexo:
1 | # 使用Homebrew安装Hexo |
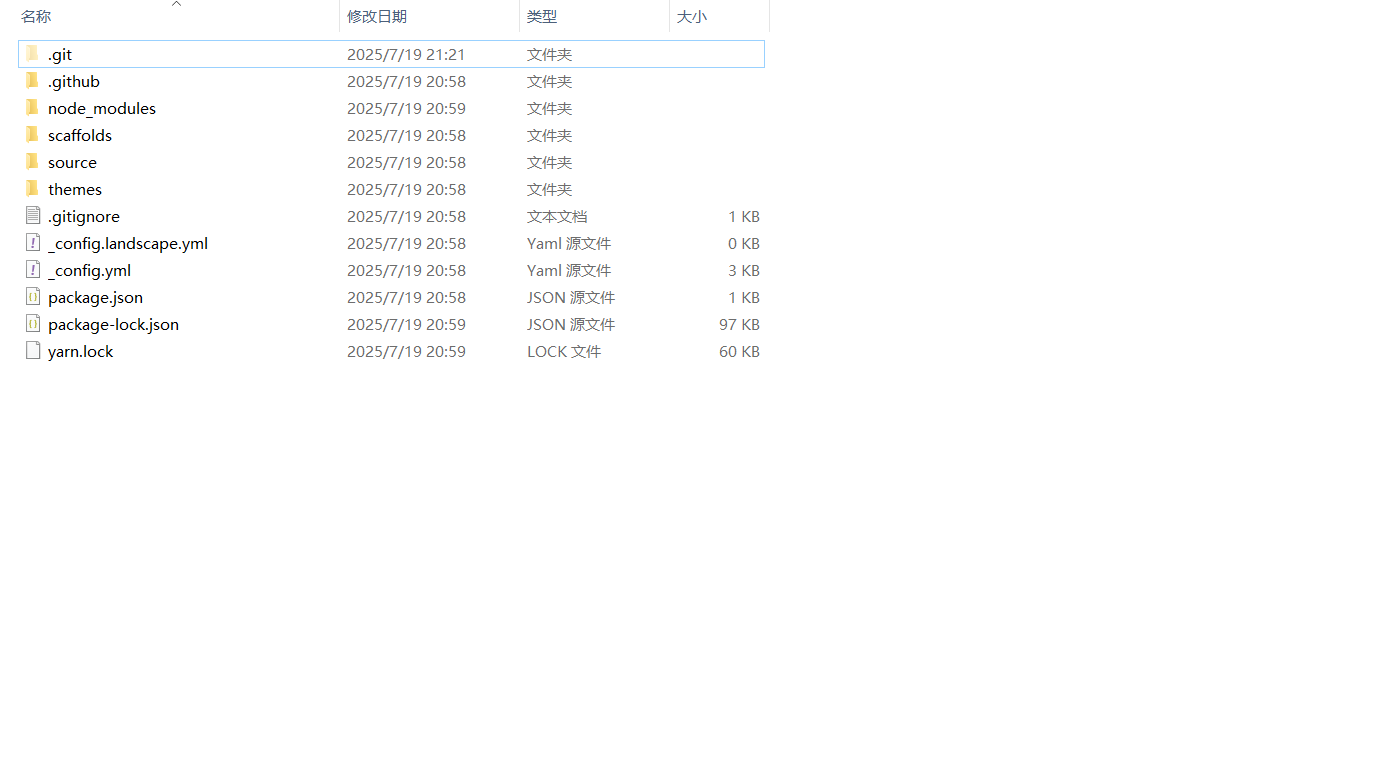
初始化成功后,blog 文件夹结构如下:
三、配置 GitHub Token(权限)
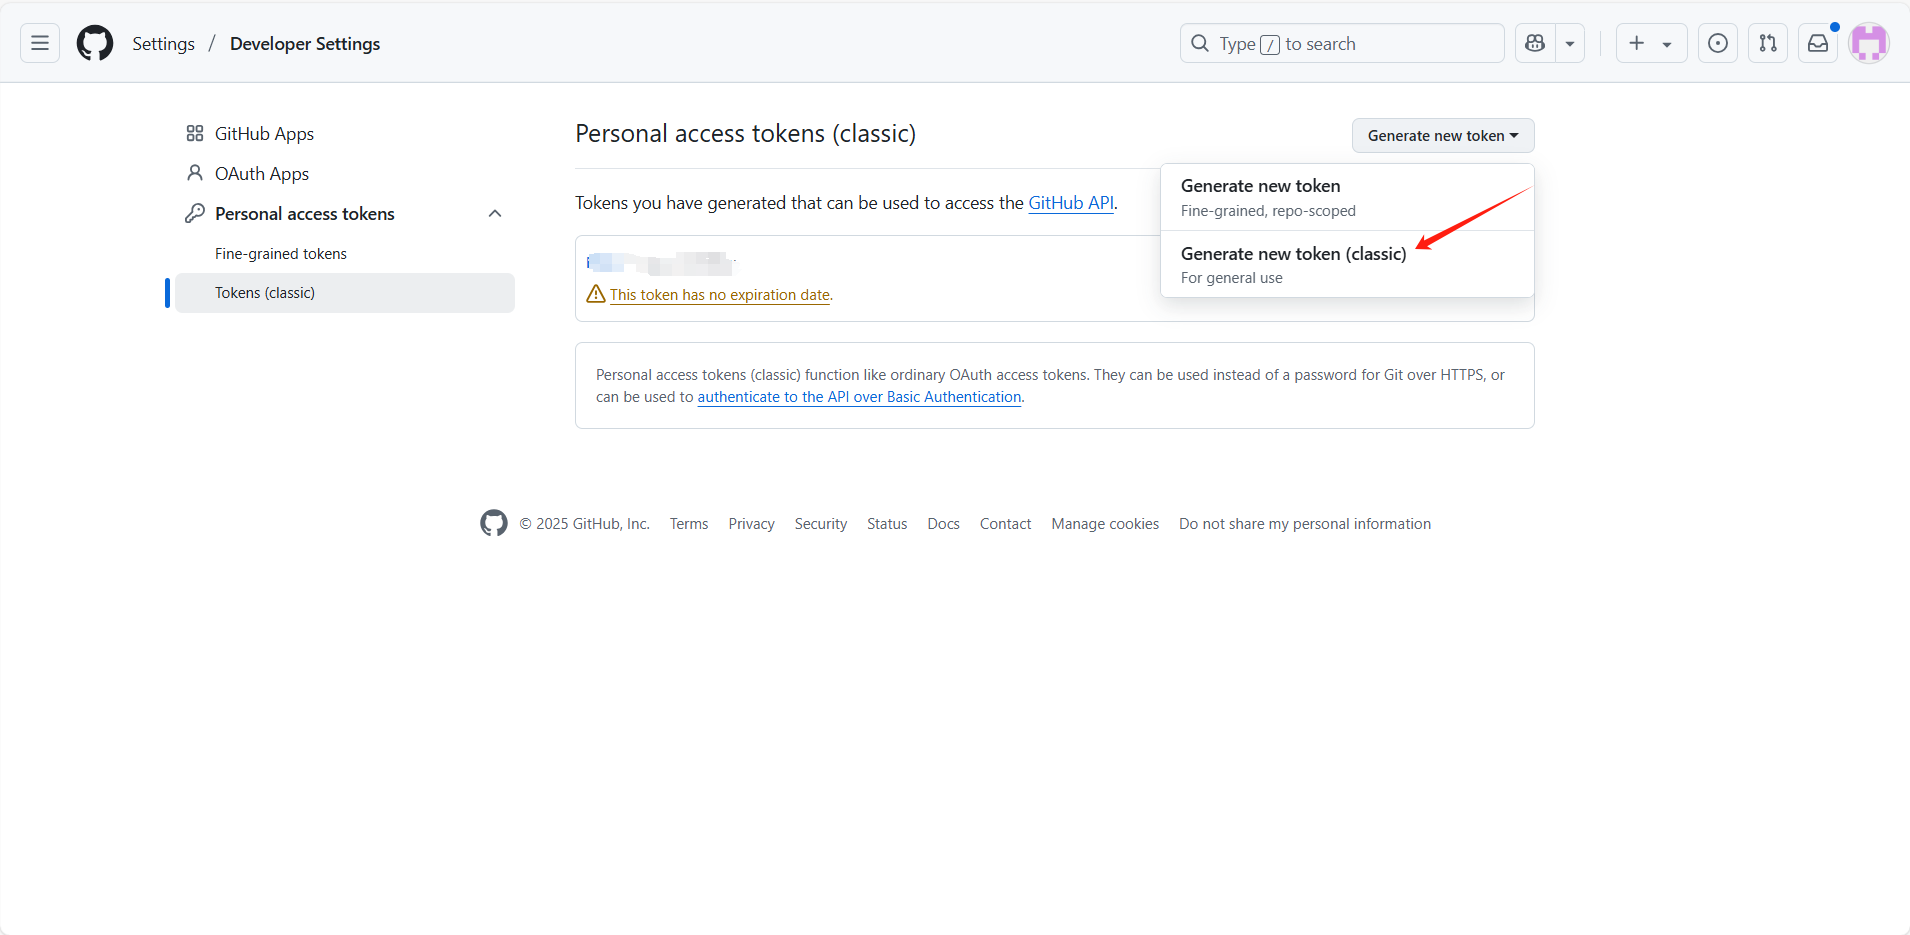
登录 GitHub,依次进入:
Settings → Developer Settings → Personal access tokens → Tokens (classic),点击 Generate new token (classic)
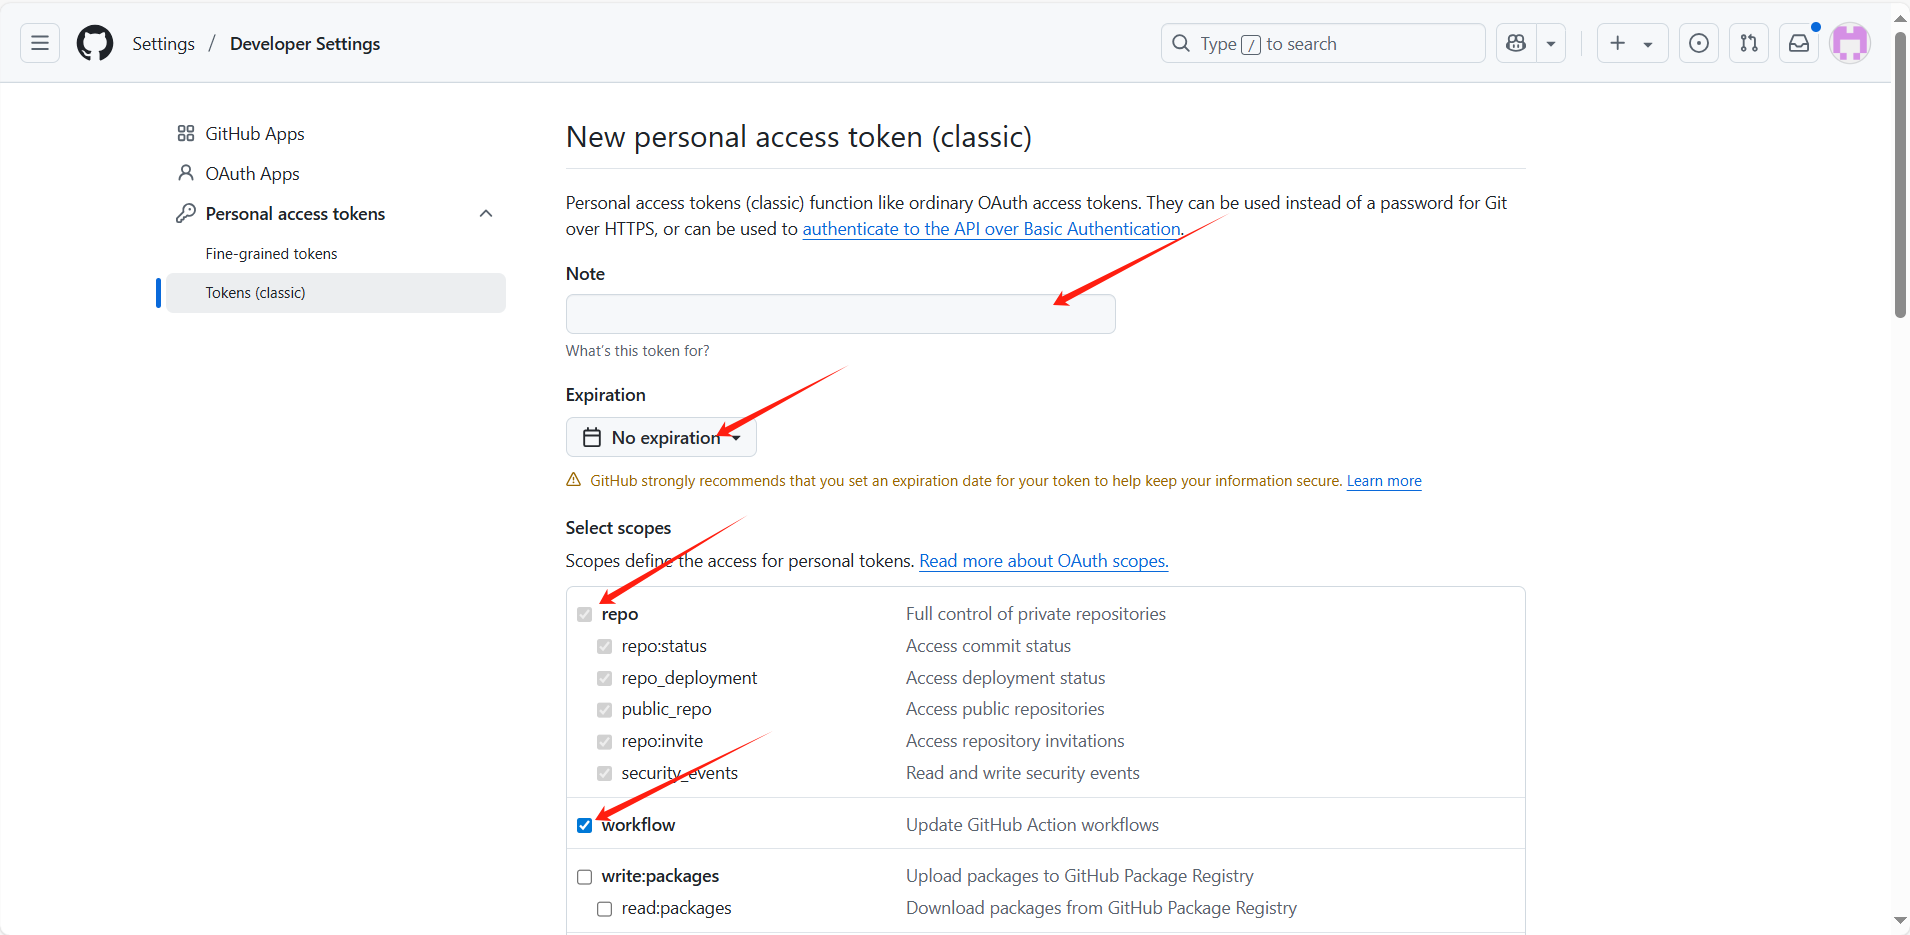
配置如下:
- Note:如
hexo-blog-token - Expiration:选择
No expiration - Scopes:勾选
repo和workflow
repo:访问和推送仓库权限workflow:触发 GitHub Actions 工作流权限
生成后复制该 Token。
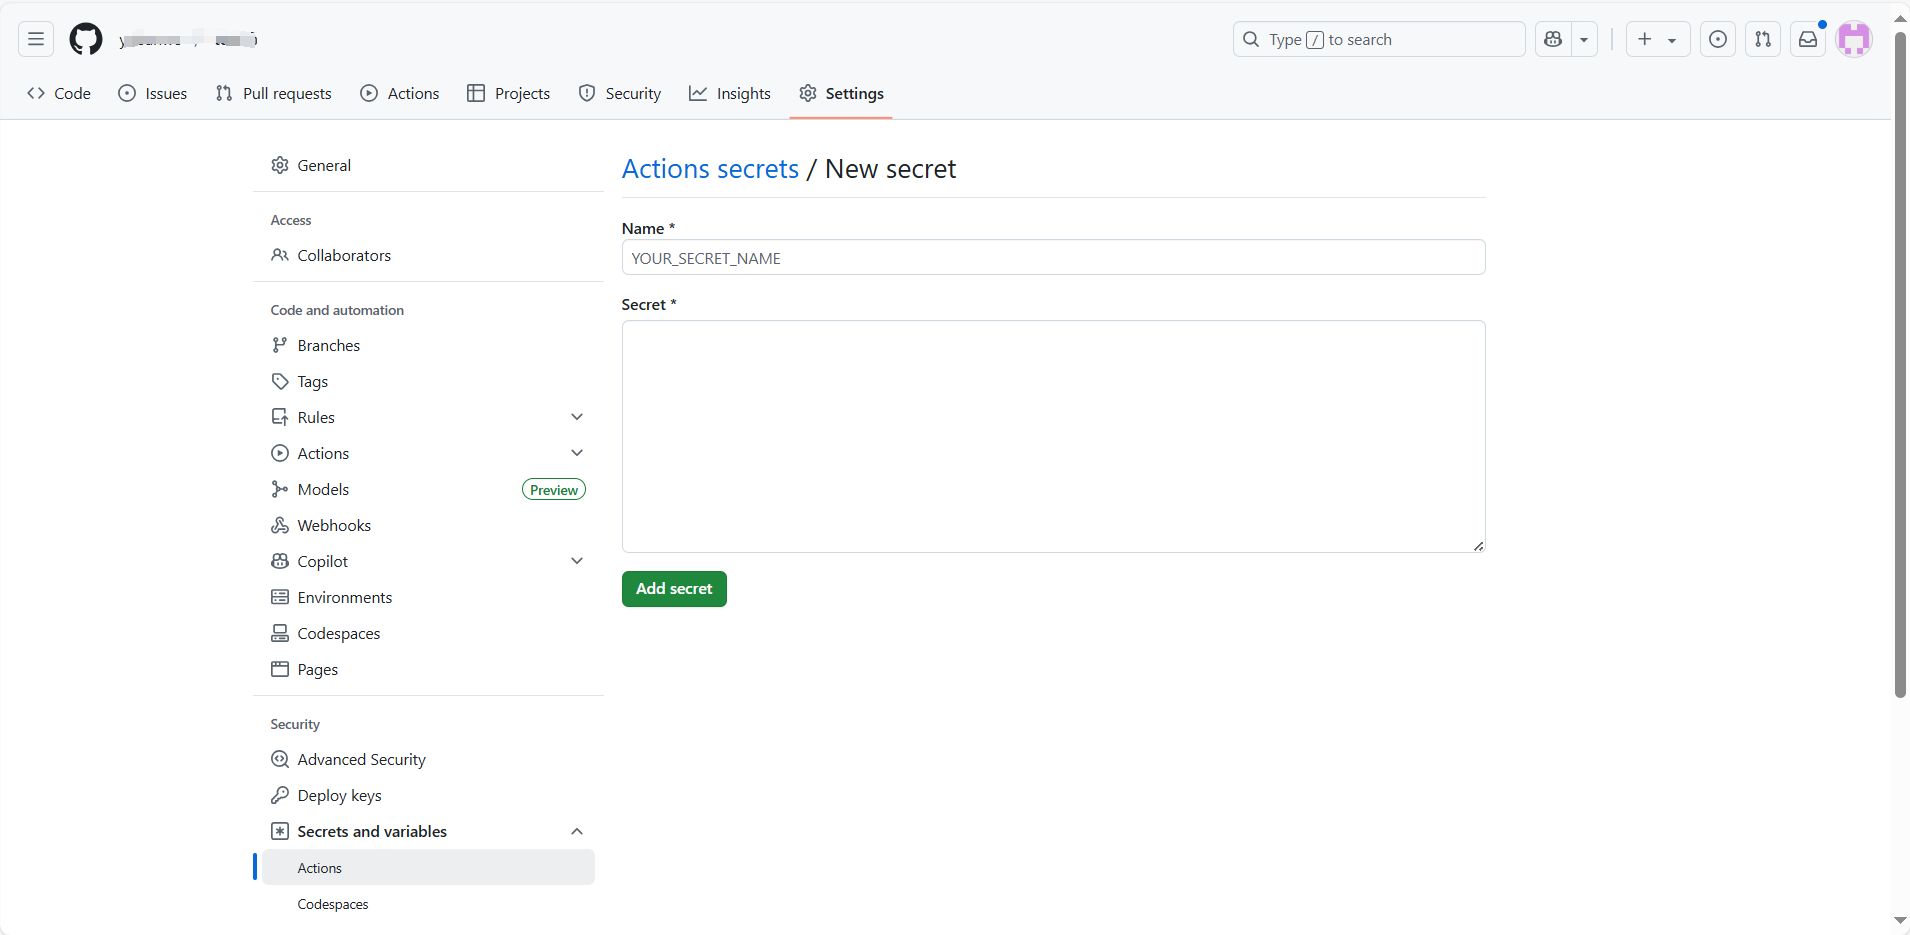
回到你的 Hexo 源码仓库,打开:Settings → Secrets and variables → Actions
点击 New repository secret:
- Name:
PERSONAL_TOKEN - Secret:粘贴你刚复制的 Token
四、配置 GitHub Actions 自动部署
在 blog 目录下创建部署配置文件:
1 | .github/workflows/deploy.yml |
内容如下:
1 | # GitHub Actions 配置文件:用于自动部署 Hexo 博客 |
五、提交 Hexo 项目到 GitHub
执行以下命令将 Hexo 源码推送到 GitHub:
1 | # 确保你在 blog 项目根目录 |
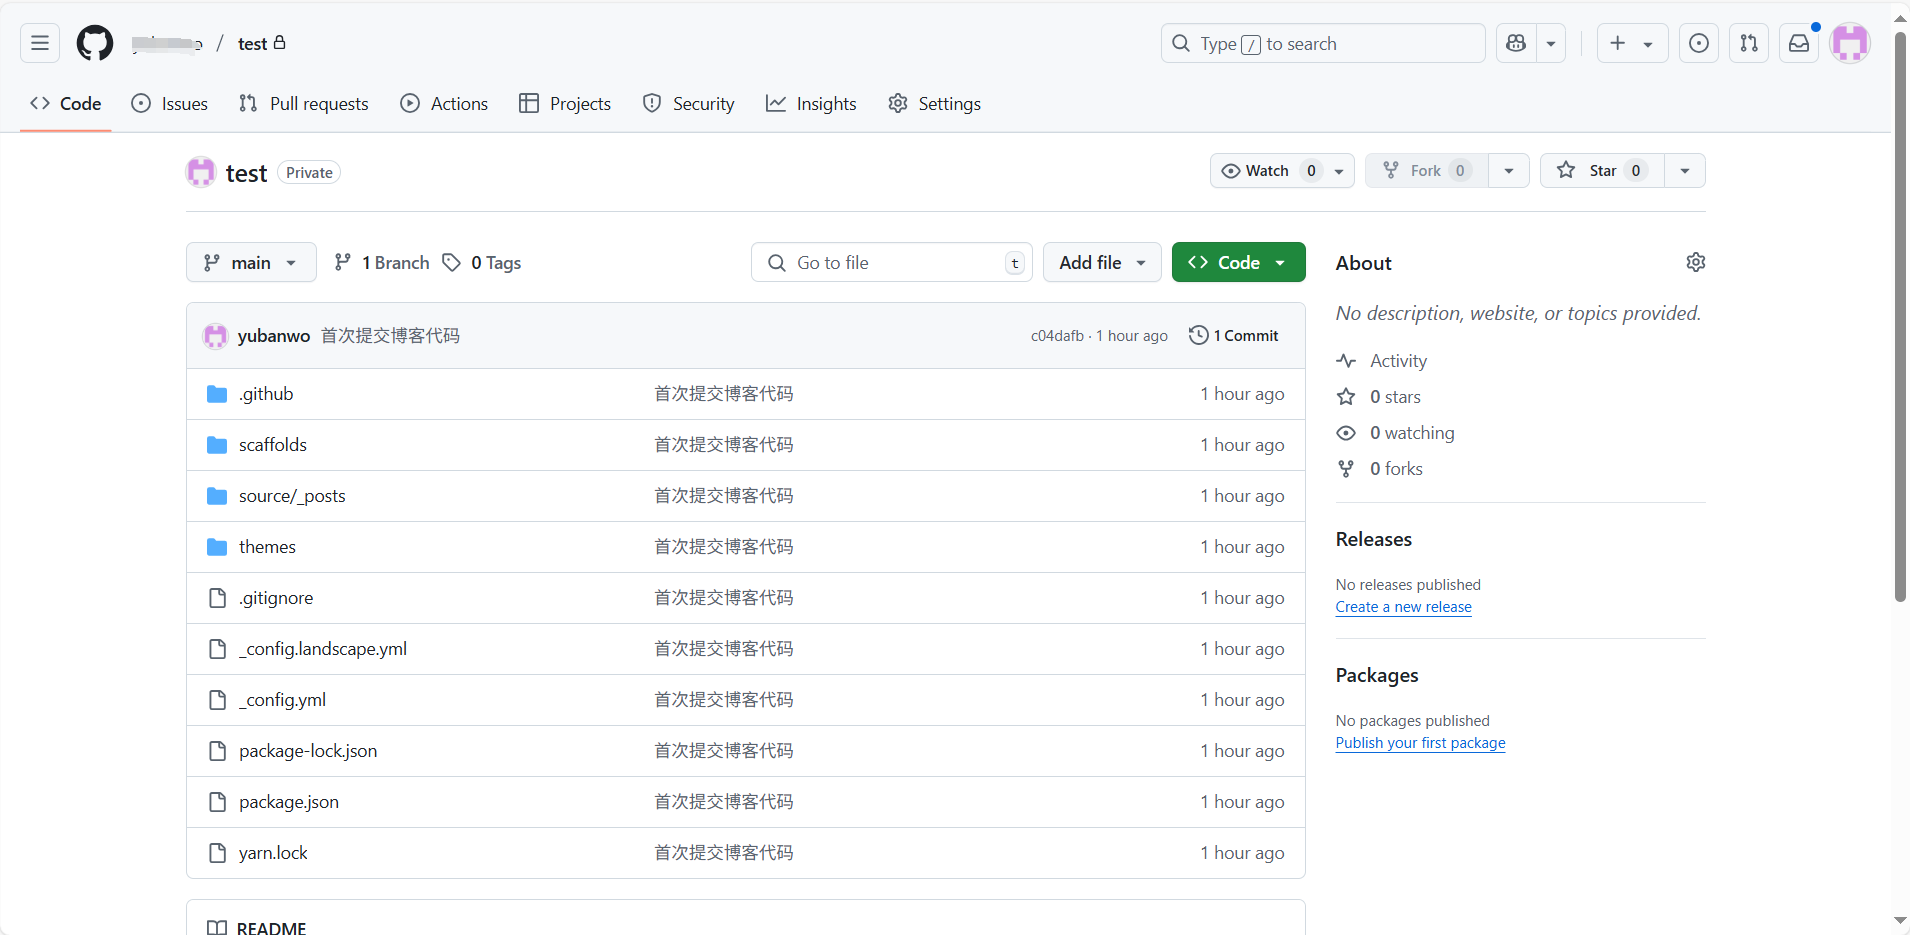
成功后,刷新 GitHub 仓库页面,你将看到所有 Hexo 源码已经上传。
六、结语
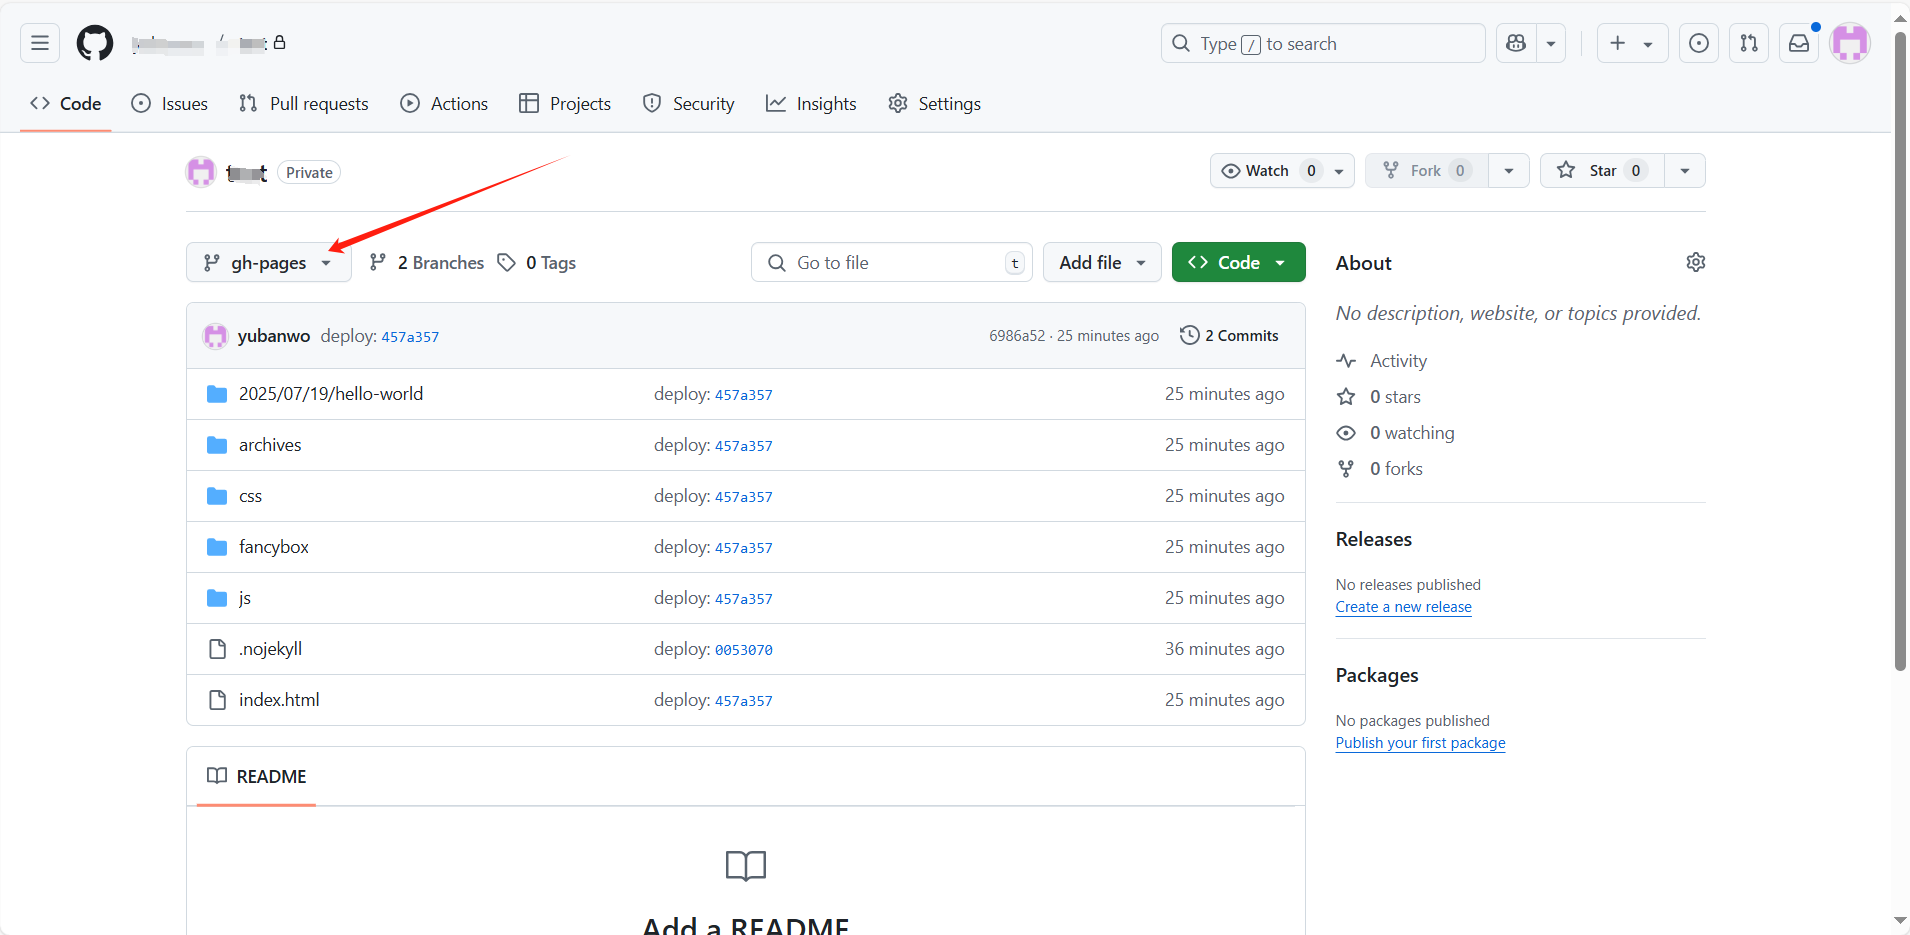
等待 GitHub Actions 执行完成之后,查看 gh-pages 分支发现已经生成文件了:
未来每次更新博客,只需执行:
1 | git add . |
GitHub Actions 将自动重新构建并部署,无需你手动操作!
此外,你也可以通过 FTP、SFTP、WebDAV 等方式部署到服务器,实现自动上传。
⚠️ 免责声明:本文仅供个人学习与技术研究使用。


喜欢这篇文章的人也看了


评论
匿名评论隐私政策
✅ 你无需删除空行,直接评论以获取最佳展示效果